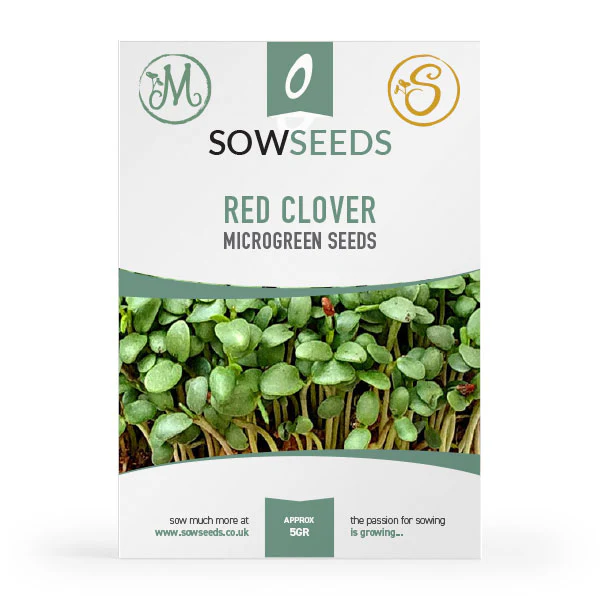
Red Clover Microgreens Seeds
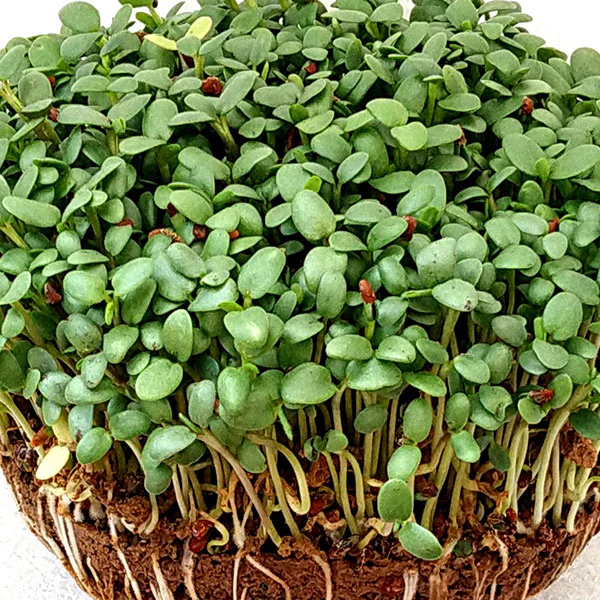
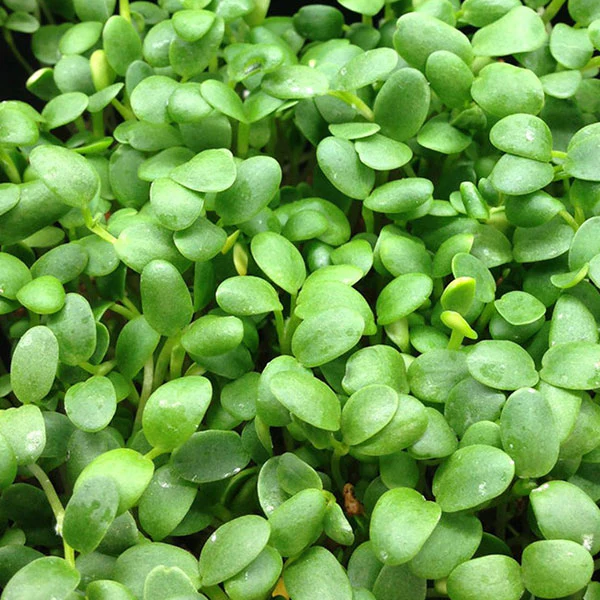
Red Clover microgreens are a lovely light green and have a fresh, mild sweetness. They’re very similar to alfalfa sprouts, but with plump, crunchy cotyledons. Also unlike alfalfa sprouts, they don’t hang onto their seed hulls, which means less work for you! In fact, these microgreens are hardly any work at all. They sprout up easily and are ready to harvest in under 12 days.
Red Clover microgreens also have excellent health benefits, especially for women. They help balance hormones, ease PMS symptoms, and even reduce hot flashes during menopause. This plant will also treat a sore throat, provide vitamins like potassium and calcium, and improve digestive, skin, and prostate health.
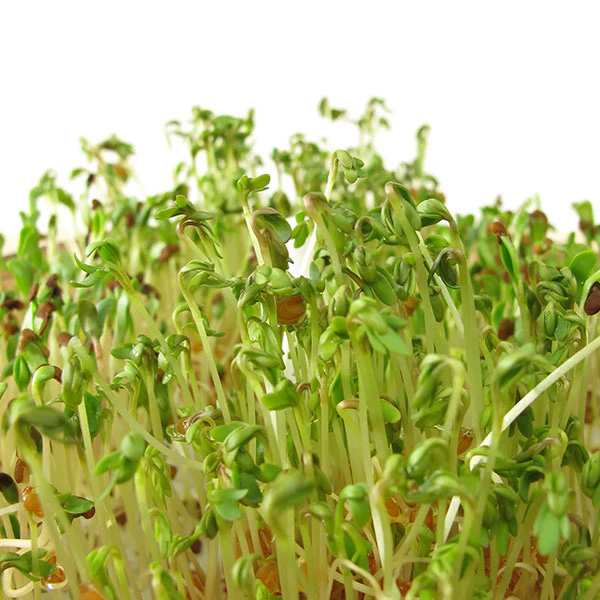
Red Clover can be grown as a microgreen and a sprout.
Culture for Growing Red Clover as a Microgreen:
Equipment
3 x Growing trays
Growing medium
- Sow 2-3 teaspoons of seed for a half seed tray on thoroughly moistened medium
- Cover your crop with another tray - to keep light out and moisture in.
- Keep your compost moist by watering lightly as needed. Don't drench!
- Use Coconut Coir and you likely won't have to water at all after planting
- When your plants have begun to show leaves, remove the cover and move your crop to a well-lit location.
- Harvest when the leaves are open and 2cm - 7cm tall (day 5-14).
- Cut just above the medium, with scissors or sharp knife.
Culture for Growing Red Clover Sprouts:
Equipment
Sprouter
Bamboo Paper
Red Clover Seeds
Culture
1. Make sure that the Sprouter is super clean and sterile.
2. Place the seeds in the bottom of the Sprouter (no grid tray in place).
3. Cover the seeds with tepid water. Stir the seeds to ensure that all the seeds get soaked, a vital process for smaller seeds. (Use water that is at room temperature, water that is either too hot or too cold can shock the seeds and also slow the germination process).
Don't put too much seed in the tray, allow the seed sufficient room to expand… insufficient space will lead to mould issues as air cannot circulate sufficiently.
4. After the initial soak of 8-12 hours, skim off any floating seeds, empty the water by using the grid tray, so that the seeds get caught in the grid, the seeds should be left damp and not swimming in water. Drain as much of the water as possible.
NOTE - if using small seeds then the Bamboo paper needs to be placed on top of the grid otherwise the seeds will fall through the grid tray!
5. Place grid tray with seeds in the Sprouter and cover with clear lid.
6. Rinse 2-3 times per day with room temperature water, by running water through the seeds on the grid tray. Use lots of water and if possible, rinse under high-pressure water. Drain as much of the water as possible.
7. After day 3 move to a well-lit location.
8. Continue rinse cycle until harvest.
9. Let the sprouts sit for 8-12 hours after their final rinse and extremely thorough drain before refrigerating them.
Did You Know?
We now stock growing essentials for Microgreens and Sprouting growers, you can find the full range HERE
Feeling daunted by the world of Microgreens and Sprouting and don't know where to start...then why not have a look at our starter kits for inspiration:
| Microgreen Kit | Sprouting Kit |
 |
 |
And don't forget to join our Microgreen Club and enjoy year-round benefits HERE

More Images
Red Clover Microgreens Seeds
Red Clover microgreens are a lovely light green and have a fresh, mild sweetness. They’re very similar to alfalfa sprouts, but with plump, crunchy cotyledons. Also unlike alfalfa sprouts, they don’t hang onto their seed hulls, which means less work for you! In fact, these microgreens are hardly any work at all. They sprout up easily and are ready to harvest in under 12 days.
Red Clover microgreens also have excellent health benefits, especially for women. They help balance hormones, ease PMS symptoms, and even reduce hot flashes during menopause. This plant will also treat a sore throat, provide vitamins like potassium and calcium, and improve digestive, skin, and prostate health.
Red Clover can be grown as a microgreen and a sprout.
Culture for Growing Red Clover as a Microgreen:
Equipment
3 x Growing trays
Growing medium
- Sow 2-3 teaspoons of seed for a half seed tray on thoroughly moistened medium
- Cover your crop with another tray - to keep light out and moisture in.
- Keep your compost moist by watering lightly as needed. Don't drench!
- Use Coconut Coir and you likely won't have to water at all after planting
- When your plants have begun to show leaves, remove the cover and move your crop to a well-lit location.
- Harvest when the leaves are open and 2cm - 7cm tall (day 5-14).
- Cut just above the medium, with scissors or sharp knife.
Culture for Growing Red Clover Sprouts:
Equipment
Sprouter
Bamboo Paper
Red Clover Seeds
Culture
1. Make sure that the Sprouter is super clean and sterile.
2. Place the seeds in the bottom of the Sprouter (no grid tray in place).
3. Cover the seeds with tepid water. Stir the seeds to ensure that all the seeds get soaked, a vital process for smaller seeds. (Use water that is at room temperature, water that is either too hot or too cold can shock the seeds and also slow the germination process).
Don't put too much seed in the tray, allow the seed sufficient room to expand… insufficient space will lead to mould issues as air cannot circulate sufficiently.
4. After the initial soak of 8-12 hours, skim off any floating seeds, empty the water by using the grid tray, so that the seeds get caught in the grid, the seeds should be left damp and not swimming in water. Drain as much of the water as possible.
NOTE - if using small seeds then the Bamboo paper needs to be placed on top of the grid otherwise the seeds will fall through the grid tray!
5. Place grid tray with seeds in the Sprouter and cover with clear lid.
6. Rinse 2-3 times per day with room temperature water, by running water through the seeds on the grid tray. Use lots of water and if possible, rinse under high-pressure water. Drain as much of the water as possible.
7. After day 3 move to a well-lit location.
8. Continue rinse cycle until harvest.
9. Let the sprouts sit for 8-12 hours after their final rinse and extremely thorough drain before refrigerating them.
Did You Know?
We now stock growing essentials for Microgreens and Sprouting growers, you can find the full range HERE
Feeling daunted by the world of Microgreens and Sprouting and don't know where to start...then why not have a look at our starter kits for inspiration:
| Microgreen Kit | Sprouting Kit |
|
|
And don't forget to join our Microgreen Club and enjoy year-round benefits HERE
Product Information
Product Information
Shipping & Returns
Shipping & Returns
Description
Red Clover microgreens are a lovely light green and have a fresh, mild sweetness. They’re very similar to alfalfa sprouts, but with plump, crunchy cotyledons. Also unlike alfalfa sprouts, they don’t hang onto their seed hulls, which means less work for you! In fact, these microgreens are hardly any work at all. They sprout up easily and are ready to harvest in under 12 days.
Red Clover microgreens also have excellent health benefits, especially for women. They help balance hormones, ease PMS symptoms, and even reduce hot flashes during menopause. This plant will also treat a sore throat, provide vitamins like potassium and calcium, and improve digestive, skin, and prostate health.
Red Clover can be grown as a microgreen and a sprout.
Culture for Growing Red Clover as a Microgreen:
Equipment
3 x Growing trays
Growing medium
- Sow 2-3 teaspoons of seed for a half seed tray on thoroughly moistened medium
- Cover your crop with another tray - to keep light out and moisture in.
- Keep your compost moist by watering lightly as needed. Don't drench!
- Use Coconut Coir and you likely won't have to water at all after planting
- When your plants have begun to show leaves, remove the cover and move your crop to a well-lit location.
- Harvest when the leaves are open and 2cm - 7cm tall (day 5-14).
- Cut just above the medium, with scissors or sharp knife.
Culture for Growing Red Clover Sprouts:
Equipment
Sprouter
Bamboo Paper
Red Clover Seeds
Culture
1. Make sure that the Sprouter is super clean and sterile.
2. Place the seeds in the bottom of the Sprouter (no grid tray in place).
3. Cover the seeds with tepid water. Stir the seeds to ensure that all the seeds get soaked, a vital process for smaller seeds. (Use water that is at room temperature, water that is either too hot or too cold can shock the seeds and also slow the germination process).
Don't put too much seed in the tray, allow the seed sufficient room to expand… insufficient space will lead to mould issues as air cannot circulate sufficiently.
4. After the initial soak of 8-12 hours, skim off any floating seeds, empty the water by using the grid tray, so that the seeds get caught in the grid, the seeds should be left damp and not swimming in water. Drain as much of the water as possible.
NOTE - if using small seeds then the Bamboo paper needs to be placed on top of the grid otherwise the seeds will fall through the grid tray!
5. Place grid tray with seeds in the Sprouter and cover with clear lid.
6. Rinse 2-3 times per day with room temperature water, by running water through the seeds on the grid tray. Use lots of water and if possible, rinse under high-pressure water. Drain as much of the water as possible.
7. After day 3 move to a well-lit location.
8. Continue rinse cycle until harvest.
9. Let the sprouts sit for 8-12 hours after their final rinse and extremely thorough drain before refrigerating them.
Did You Know?
We now stock growing essentials for Microgreens and Sprouting growers, you can find the full range HERE
Feeling daunted by the world of Microgreens and Sprouting and don't know where to start...then why not have a look at our starter kits for inspiration:
| Microgreen Kit | Sprouting Kit |
|
|
And don't forget to join our Microgreen Club and enjoy year-round benefits HERE